

Now IS THe Time To...

Crawl Space Services In Knoxville, TN
Stetson Howard: 865-432-6743
CRAWL SPACE ENCAPSULATION, REPAIR, WATERPROOFING & MOLD REMOVAL
No-Obligation, Free Inspections
No-Obligation Free Estimates
We Warranty All of Our Work
100% Satisfaction Guaranteed
Flood prevention is a critical aspect of property management and environmental stewardship. Whether you live in a flood-prone area or not, taking proactive measures to prevent flooding can save you from significant financial losses, protect your property, and contribute to the overall safety and well-being of your community. Floods can occur due to a variety of reasons, including heavy rainfall, melting snow, storm surges, and inadequate drainage systems. The impact of flooding can be devastating, leading to property damage, loss of valuable possessions, and even posing serious health risks due to waterborne diseases and mold growth.
Why Flood Prevention Matters
Flood prevention is not just about protecting individual properties; it plays a vital role in
safeguarding the broader community and environment. Effective flood prevention measures can:
- Protect Property and Infrastructure: Floods can cause extensive damage to homes, roads, bridges, and other infrastructure. Preventive measures help reduce the risk of such damage, saving costs on repairs and maintenance.
- Ensure Public Safety: Floodwaters can be hazardous, carrying debris and pollutants that pose health risks. Preventing floods helps maintain safe and healthy living conditions.
- Preserve the Environment: Floods can erode soil, destroy vegetation, and disrupt ecosystems. Flood prevention helps maintain ecological balance and protects natural habitats.
- Maintain Economic Stability: Flooding can disrupt local economies by damaging businesses, agriculture, and transportation networks. Preventive measures ensure economic activities continue without major interruptions.
Key Strategies for Flood Prevention
Implementing effective flood prevention strategies involves a combination of planning, infrastructure improvements, and community awareness. Some essential strategies include:
- Proper Drainage Systems: Ensuring that your property has adequate drainage systems, such as French drains, swales, and retention ponds, can significantly reduce the risk of flooding.
- Rainwater Management: Techniques like rain gardens, green roofs, and permeable pavements help manage rainwater runoff, reducing the burden on drainage systems and minimizing flood risks.
- Building Regulations and Zoning: Adhering to building codes and zoning laws that consider flood risks can help in constructing flood-resistant structures and maintaining safe development practices.
- Community Engagement: Educating and involving the community in flood prevention efforts ensures collective action and preparedness, enhancing the overall resilience of the area.
In conclusion, flood prevention is a crucial element of protecting your property, ensuring public safety, preserving the environment, and maintaining economic stability. By understanding the importance of flood prevention and implementing appropriate measures, you can contribute to a safer and more resilient community. Stay proactive and informed to keep your property and loved ones safe from the potential dangers of flooding.
Understanding Your Property's Drainage Needs
Proper drainage is essential for maintaining a safe and functional property. Understanding your property's drainage needs involves assessing current systems and recognizing factors that influence flood risk. By identifying potential issues and understanding their causes, you can implement effective solutions to protect your property.
Assessing Current Drainage Systems
Identifying Signs of Inadequate Drainage
Recognizing the signs of inadequate drainage is the first step in assessing your property’s drainage systems. Look for the following indicators:
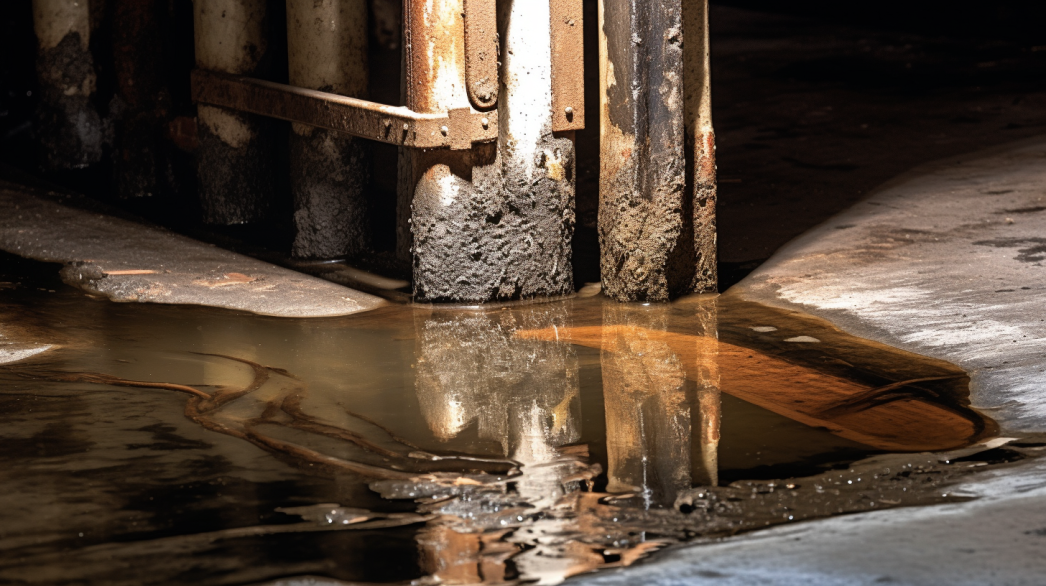
- Standing Water: Persistent puddles or pools of water after rain can indicate poor drainage. These areas are not only unsightly but can also become breeding grounds for mosquitoes and other pests.
- Soil Erosion: Noticeable gullies, exposed roots, or sediment deposits can signal that water is flowing too quickly across the surface, carrying soil away with it.
- Foundation Issues: Water pooling near the foundation can lead to cracks and structural damage over time. Damp or wet basements are also a sign of poor drainage.
- Plant Health: Plants suffering from root rot or appearing stressed may be in areas where water accumulates and does not drain properly.
- Muddy Areas: Consistently soggy or muddy patches in your yard indicate that the soil is not draining adequately, leading to waterlogged conditions.
Evaluating Existing Drainage Systems for Effectiveness
Once you’ve identified signs of inadequate drainage, evaluate your current drainage systems to determine their effectiveness:
- Gutters and Downspouts: Ensure gutters are clean and downspouts direct water away from the foundation. Check for leaks or clogs that could impede water flow.
- French Drains: Inspect French drains for signs of blockages or damage. Ensure they are properly directing water away from the problem areas.
- Surface Drains and Swales: Check that surface drains and swales are clear of debris and correctly channeling water to appropriate outlets.
- Slope and Grading: Verify that your yard slopes away from structures, facilitating natural runoff. Areas that slope towards your home may require regrading to improve drainage.
Factors Influencing Flood Risk
Climate and Weather Patterns
The climate and weather patterns in your region significantly affect flood risk and drainage needs:
- Rainfall Intensity and Frequency: Areas with frequent or heavy rainfall require more robust drainage solutions to manage large volumes of water.
- Seasonal Variations: Consider how seasonal changes, such as snowmelt or dry periods followed by intense rain, impact drainage. Flood risk can increase during transitional seasons.
Topography and Soil Type
The physical characteristics of your property play a crucial role in drainage efficiency:
- Topography: The natural slope and contours of your land determine how water flows. Flat areas may struggle with water accumulation, while steep slopes can lead to rapid runoff and erosion.
- Soil Type: Different soils have varying drainage capacities. Sandy soils drain quickly, while clay soils retain water and may cause drainage issues. Conduct a soil test to understand your soil type and its drainage characteristics.
Property Layout and Landscape Design
The way your property is laid out and landscaped also influences its drainage needs:
- Impervious Surfaces: Driveways, patios, and roofs that do not absorb water contribute to runoff. Consider permeable paving options or drainage solutions to manage water from these surfaces.
- Landscaping Features: Gardens, lawns, and plant beds can either help or hinder drainage. Properly designed rain gardens, for example, can enhance drainage by capturing and infiltrating runoff.
- Structures and Additions: Buildings, sheds, and other structures can alter water flow patterns. Ensure they are integrated into the drainage plan to prevent water from accumulating around foundations.
By thoroughly assessing your current drainage systems and understanding the factors that influence flood risk, you can take proactive steps to improve drainage on your property. This not only protects your home and landscape from water damage but also enhances the overall health and usability of your outdoor spaces.
Types of Drainage Systems for Flood Prevention
Effective flood prevention requires a combination of surface and subsurface drainage systems. Understanding the different types of drainage systems and their benefits can help you choose the best solutions for your property.
Surface Drainage Systems
Description and Examples
Surface drainage systems are designed to remove excess water from the surface of the land, preventing water accumulation and potential flooding. These systems are essential for managing runoff from roofs, paved areas, and landscaped regions.
- Gutters and Downspouts: These are installed along the edges of roofs to collect rainwater and direct it away from the building. Gutters capture water as it flows off the roof, while downspouts carry it down to ground level, often directing it away from the foundation.
- Swales: Swales are shallow, vegetated channels that guide surface water to a designated outlet, such as a storm drain or a natural watercourse. They can be lined with grass or other plants to slow down water flow and promote infiltration.
- Surface Drains: These are grates or basins installed in areas where water tends to pool, such as driveways and patios. They collect and channel water away from these surfaces.
Benefits and Suitable Applications
- Benefits: Surface drainage systems are relatively easy to install and maintain. They effectively manage large volumes of water, prevent erosion, and protect structures from water damage.
- Suitable Applications: These systems are ideal for residential properties, commercial buildings, and areas with heavy rainfall. They are particularly useful in landscapes with gentle slopes where water can naturally flow to the desired outlet.
Subsurface Drainage Systems
Description and Examples
Subsurface drainage systems address water that has infiltrated the soil, preventing soil saturation and protecting structures from water damage.
- French Drains: These consist of a perforated pipe placed in a gravel-filled trench. Water enters the trench, flows into the pipe, and is redirected away from problem areas. French drains are commonly used around foundations and in low-lying areas.
- Trench Drains: These are narrow channels with grates on top, typically used along driveways, patios, and other paved areas. They collect and convey surface water to a designated drainage point.
- Dry Wells: Underground structures that collect and slowly release stormwater into the ground. Dry wells are often used in conjunction with other drainage systems to handle overflow.
Benefits and Suitable Applications
- Benefits: Subsurface drainage systems manage groundwater effectively, prevent soil saturation, and protect foundations and basements from water damage. They also reduce surface runoff and erosion.
- Suitable Applications: These systems are best suited for properties with poor surface drainage, heavy clay soils, or high groundwater levels. They are ideal for areas with significant rainfall or drainage issues that cannot be solved by surface systems alone.
Combined Drainage Solutions
Integrating Surface and Subsurface Systems for Maximum Effectiveness
Combining surface and subsurface drainage systems provides a comprehensive approach to managing water on your property. By integrating these systems, you can address both immediate runoff and longer-term groundwater management, ensuring maximum effectiveness in flood prevention.
- Example 1: A residential property with a history of basement flooding might use gutters and downspouts to manage roof runoff, French drains to handle groundwater around the foundation, and a dry well to manage excess water from the downspouts.
- Example 2: A commercial property with extensive paved areas might use trench drains to collect water from driveways and parking lots, swales to guide surface water, and a retention pond to hold and slowly release stormwater.
Examples of Combined Systems in Flood-Prone Areas
- Flood-Prone Residential Area: In a flood-prone residential neighborhood, homes might integrate surface systems like gutters, downspouts, and swales with subsurface solutions such as French drains and dry wells. This combination helps manage both immediate runoff during heavy rains and persistent groundwater issues, reducing the risk of flooding and water damage.
- Urban Development: An urban development project might use permeable pavements to reduce surface runoff, combined with trench drains along streets and sidewalks, and subsurface storage tanks to handle excess water. This comprehensive approach manages water efficiently, preventing urban flooding and maintaining infrastructure integrity.
By understanding and implementing the appropriate types of drainage systems, you can effectively prevent flooding and protect your property. Combining surface and subsurface solutions ensures a robust and reliable drainage system capable of handling various water management challenges.
Planning Effective Drainage Upgrades
Effective drainage upgrades are crucial for protecting your property from water damage and enhancing its overall usability. This guide will help you set clear goals, prioritize critical areas, and create a detailed plan for your drainage upgrade project.
Setting Goals and Priorities
Determining the Scope of Your Drainage Upgrade Project
The first step in planning your drainage upgrades is to determine the scope of your project. Assess the current state of your property’s drainage system and identify the specific problems you need to address. Consider whether you need minor adjustments or a comprehensive overhaul.
- Small-Scale Upgrades: If you’re dealing with minor issues like occasional pooling water or minor erosion, small-scale upgrades such as extending downspouts, adding soil to low areas, or installing simple surface drains might suffice.
- Large-Scale Upgrades: For more severe issues like frequent flooding, significant soil erosion, or persistent waterlogging, a larger-scale project involving both surface and subsurface drainage systems will be necessary. This might include installing French drains, swales, dry wells, or retention ponds.
Prioritizing Areas Based on Flood Risk and Impact
Once you have a clear understanding of the scope, prioritize the areas of your property that need attention based on their flood risk and potential impact.
- High-Risk Areas: Focus on areas with the highest flood risk first. These might include spots near the foundation, low-lying regions, and locations where water accumulates during heavy rainfall. Addressing these areas can prevent significant damage to your property.
- Moderate-Risk Areas: Next, prioritize areas that affect the usability of your yard, such as waterlogged lawns or garden beds. Improving drainage in these spots will enhance the health of your plants and the overall enjoyment of your outdoor space.
- Low-Risk Areas: Lastly, consider minor issues that do not pose an immediate threat but can improve the overall drainage efficiency of your property. These might include slight regrading of the landscape or adding additional drainage in less critical areas.
Creating a Detailed Plan
Mapping Out Your Property and Drainage Lines
A detailed plan begins with a thorough mapping of your property and existing drainage lines.
- Property Mapping: Create a scaled map of your property, noting all significant features such as buildings, driveways, paths, and existing drainage systems. Identify areas where water tends to accumulate and mark them on the map.
- Drainage Lines: Plan the path for new drainage lines. Ensure they direct water away from structures and towards appropriate discharge points like storm drains, swales, or natural watercourses. Use stakes and string to outline these paths on the ground for a clear visual reference.
Choosing the Appropriate Drainage Systems for Each Area
Selecting the right drainage system for each area of your property is critical to the success of your drainage upgrade project.
Surface Drainage Systems: For areas with surface water accumulation, such as roofs and paved surfaces, consider gutters, downspouts, swales, and surface drains. These systems effectively manage runoff and prevent erosion.
- Gutters and Downspouts: Ensure gutters are clean and downspouts direct water away from the foundation.
- Swales: Design swales to guide water towards natural drainage areas, using vegetation to slow and filter runoff.
- Surface Drains: Install in areas like driveways and patios to quickly remove standing water.
Subsurface Drainage Systems: For managing groundwater and preventing soil saturation, use French drains, trench drains, and dry wells.
- French Drains: Ideal for areas around foundations and low-lying spots, French drains redirect groundwater to prevent waterlogging.
- Trench Drains: Useful along driveways and walkways, these drains collect and channel surface water effectively.
- Dry Wells: Install dry wells to handle overflow from gutters and downspouts, allowing water to infiltrate into the ground.
By setting clear goals, prioritizing high-risk areas, and creating a detailed plan that includes mapping your property and selecting appropriate drainage systems, you can effectively upgrade your drainage infrastructure. This proactive approach will protect your property, enhance its functionality, and contribute to a healthier and more resilient landscape.
Gathering Necessary Tools and Materials
Before starting any drainage project, it's crucial to gather the right tools and materials. Having the appropriate equipment ensures that your work is efficient, effective, and long-lasting.
Essential Tools
Having the right tools is fundamental for successfully installing and maintaining drainage systems. Here are some essential tools you will need:
Basic Tools
- Shovels: Shovels are indispensable for digging trenches and moving soil. A pointed shovel is ideal for breaking ground, while a flat shovel is useful for scooping and leveling soil.
- Trenchers: For larger projects, a trencher can save considerable time and effort. Trenchers are machines designed to quickly dig narrow trenches for pipes or cables.
- Levels: Ensuring proper slope and alignment is critical for effective drainage. A standard bubble level can be used for small projects, while a laser level provides greater accuracy for larger or more complex tasks.
- Wheelbarrows: Useful for transporting soil, gravel, and other materials around your yard. They make it easier to manage large quantities of material with less physical strain.
Specialized Tools for Specific Tasks
- Pipe Cutters: Essential for cutting drainage pipes to the required lengths. Ensure you have a cutter suitable for the type of pipe you are using, such as PVC or corrugated pipe cutters.
- Compactors: Compactors are used to compress soil and aggregates, ensuring a stable base for pipes and other drainage components. Handheld compactors are suitable for small areas, while plate compactors are better for larger spaces.
- Post Hole Diggers: Useful for creating deep, narrow holes for vertical drainage solutions like dry wells.
Required Materials
The materials you choose will directly impact the effectiveness and durability of your drainage system. Selecting the right types of pipes, aggregates, and other components is essential.
Types of Drainage Pipes
- PVC Pipes: PVC (polyvinyl chloride) pipes are rigid, durable, and resistant to corrosion. They are ideal for permanent installations and provide excellent flow capacity. PVC pipes are commonly used in French drains and other subsurface drainage systems.
- Corrugated Pipes: These flexible pipes are made from high-density polyethylene (HDPE) and are easy to install, especially in curved or uneven areas. They are suitable for surface and subsurface drainage applications.
Aggregates
- Gravel: Gravel is used to create a stable base and improve water flow around drainage pipes. It helps prevent soil from clogging the system and facilitates efficient water movement.
- Crushed Stone: Similar to gravel, crushed stone provides excellent drainage and stability. It is often used in French drains and other subsurface systems to support and protect pipes.
Other Materials
- Filter Fabric: Also known as geotextile fabric, this material prevents soil from entering and clogging the drainage system while allowing water to pass through. It is essential for maintaining the efficiency of French drains and other subsurface solutions.
- Connectors: Various connectors, such as couplings, elbows, and tees, are required to join pipes and direct water flow. Ensure you have the appropriate connectors for your pipe types.
- Sealants: Sealants are used to ensure watertight connections between pipes and other components. They help prevent leaks and maintain the integrity of the drainage system.
Gathering the necessary tools and materials before starting your drainage project ensures that you are well-prepared to tackle the task efficiently. With the right equipment and supplies, you can create a reliable and effective drainage system that protects your property and enhances its usability.
Step-by-Step Guide to Upgrading Your Drainage System
Upgrading your drainage system is essential for protecting your property from water damage and enhancing its functionality. This step-by-step guide will help you prepare the site, install surface drainage solutions, and set up subsurface drainage systems effectively.
Step 1 - Preparing the Site
Proper preparation is crucial for a successful drainage upgrade. Ensuring the site is ready and safe will make the installation process smoother and more efficient.
Clearing the Area and Marking Out Drainage Lines
- Clear the Area: Remove any debris, plants, or obstacles from the work area. This will give you a clear view of the landscape and make it easier to plan and execute your project.
- Marking Out Drainage Lines: Use stakes, string, or spray paint to mark the paths where drainage lines will be installed. Clearly outline the locations for gutters, downspouts, swales, ditches, and any subsurface systems. Accurate marking helps prevent mistakes and ensures proper alignment and flow.
Ensuring Safety Measures Are in Place
- Utility Check: Before digging, contact local utility companies to mark underground lines for gas, water, and electricity. This prevents accidental damage and ensures safety.
- Protective Gear: Wear appropriate protective gear, including gloves, safety goggles, and sturdy footwear. If using power tools, ensure you follow all safety guidelines.
- Site Safety: Keep the work area clear of unnecessary personnel and pets to avoid accidents. Ensure tools and materials are stored safely when not in use.
Step 2 - Installing Surface Drainage Solutions
Surface drainage solutions manage water runoff from roofs, paved areas, and landscapes. Proper installation is key to their effectiveness.
- Gutter Installation: Secure gutters along the roof edge, ensuring a slight slope towards the downspouts to facilitate water flow. Use brackets or hangers spaced evenly to support the gutter’s weight.
- Downspout Installation: Attach downspouts to the gutters, directing water away from the foundation. Extend the downspouts with splash blocks or flexible pipes to guide water at least 5-10 feet away from the house.
- Maintenance: Regularly clean gutters and downspouts to prevent blockages. Check for leaks or damage and repair as needed to maintain efficiency.
Creating and Maintaining Swales and Drainage Ditches
- Creating Swales: Dig shallow, sloped channels along the natural contours of your yard to guide water towards a designated discharge area. Line the swale with grass or other erosion-resistant vegetation.
- Building Ditches: For larger volumes of water, dig deeper ditches and line them with gravel or rocks to prevent erosion. Ensure the ditch has a consistent slope to facilitate water flow.
- Maintenance: Regularly inspect swales and ditches for debris or sediment buildup. Clear any obstructions and maintain vegetation to ensure effective drainage.
Step 3 - Installing Subsurface Drainage Solutions
Subsurface systems handle groundwater and prevent soil saturation, protecting your property from water damage.
Digging Trenches for French Drains
- Trench Depth and Width: Dig trenches to the required depth and width for your French drain system, typically 18-36 inches deep and 12 inches wide. Ensure the trench follows the marked drainage lines.
- Lining the Trench: Line the trench with geotextile fabric to prevent soil from entering and clogging the drainage system.
Laying Pipes and Adding Gravel
- Pipe Placement: Place perforated pipes in the trench, ensuring the holes face downward to collect water from the soil. Connect pipes using appropriate fittings to cover the entire length of the trench.
- Adding Gravel: Fill the trench with clean, coarse gravel up to a few inches below the surface. This allows water to flow freely through the gravel and into the perforated pipe.
- Covering the Trench: Fold the excess geotextile fabric over the gravel, then cover with soil and grass to restore the appearance of your yard.
Ensuring Proper Slope for Drainage
- Slope Measurement: Use a level to ensure the trench has a consistent slope, ideally a 1-2% gradient (1-2 inches of drop per 10 feet). This ensures water flows smoothly through the system and away from your property.
- Final Inspection: Before covering the trench, check the entire system for proper alignment and slope. Make any necessary adjustments to ensure optimal drainage.
By following these steps and adhering to best practices, you can effectively upgrade your drainage system. Proper planning, preparation, and installation will protect your property, enhance its usability, and contribute to a healthier and more resilient landscape.
FAQs
Recent Blog Posts
Crawl Space News


Schedule Your FREE Crawl Space Evaluation!
Did you know YOU DON'T HAVE TO BE HOME for us to provide you with your 100% FREE crawl space inspection and report?
Call Us Today at: 865-432-6743

Forever Guard Crawl Space Encapsulation and Repair of Knoxville is a specialty crawl space waterproofing company that services the greater Knoxville, TN and surrounding areas.
Business Hours
Sunday: 7:00 AM - 7:00 PM
Monday: 7:00 AM - 7:00 PM
Tuesday: 7:00 AM - 7:00 PM
Wednesday: 7:00 AM - 7:00 PM
Thursday: 7:00 AM - 7:00 PM
Friday: 7:00 AM - 7:00 PM
Saturday: 7:00 AM - 7:00 PM
legal info