

Now IS THe Time To...

Crawl Space Services In Knoxville, TN
Stetson Howard: 865-432-6743
CRAWL SPACE ENCAPSULATION, REPAIR, WATERPROOFING & MOLD REMOVAL
No-Obligation, Free Inspections
No-Obligation Free Estimates
We Warranty All of Our Work
100% Satisfaction Guaranteed
Welcome to our insightful exploration into the world of home maintenance, focusing on the often-underestimated importance of regular waterproofing inspections. This blog aims to shed light on why these inspections are not just a routine check but a fundamental aspect of preserving the integrity and comfort of your home.
Ensuring Longevity and Safety Through Diligent Inspections
Waterproofing is a vital defense mechanism for any home, protecting it from the damaging effects of moisture and water ingress. However, like any protective measure, it needs regular scrutiny to ensure it continues to function effectively. Regular waterproofing inspections are crucial for identifying potential issues before they escalate into major problems, saving homeowners from costly repairs and structural damage.
The Power of a Comprehensive Checklist in Maintaining a Waterproof Home
Proactive Approach: A comprehensive checklist serves as a roadmap for thoroughly examining every aspect of your home's waterproofing system. It ensures that no component of the system is overlooked, from the roof down to the foundation.
Identifying Vulnerabilities: This checklist helps in pinpointing areas that are prone to water damage or have shown signs of wear and tear. Early detection of such vulnerabilities can lead to prompt repairs and reinforcements, thereby maintaining the home's waterproof integrity.
Long-Term Benefits: Regularly following a detailed waterproofing inspection checklist can extend the lifespan of your home's waterproofing system. It ensures that your home remains dry, healthy, and structurally sound, providing peace of mind and enhancing your living environment.
In this blog, we will delve into the specifics of what makes regular waterproofing inspections so vital. We will guide you through creating and utilizing a comprehensive checklist that covers all bases, ensuring your home remains a safe and dry haven for years to come.
Join us as we navigate the essentials of maintaining a waterproof home, emphasizing the importance of regular inspections and the effectiveness of a well-planned checklist.
Preparing for a Waterproofing Inspection
Conducting a waterproofing inspection is a critical part of home maintenance, ensuring that your living space remains dry, safe, and structurally sound. This section will guide you through understanding the basics of waterproofing and how to effectively prepare for an inspection.
Understanding the Basics of Waterproofing
Quick Primer on Common Waterproofing Systems and Their Components
- Waterproofing systems vary depending on the area of the home but typically include external and internal solutions. External waterproofing might involve the use of membranes, coatings, or drainage systems to prevent water from entering the home. Internal waterproofing can include sealants, sump pumps, and dehumidifiers to manage any moisture that does penetrate.
- Key components to be aware of include foundation waterproofing, basement or crawl space systems, and water-resistant barriers on roofs and walls.
The Role of Waterproofing in Home Maintenance and Safety
- Waterproofing plays a crucial role in preserving the structural integrity of your home. It prevents water damage that can lead to costly repairs and potential safety hazards like mold growth, wood rot, and even foundation failure.
- Regular inspections and maintenance of waterproofing systems are essential for early detection of problems and prolonging the life of these systems, thereby ensuring a safe and comfortable living environment.
Setting Up for Inspection
Steps to Prepare Your Home for a Thorough Waterproofing Inspection
- Start by visually inspecting your home's exterior, looking for signs of water damage or deterioration, such as peeling paint, cracks in the foundation, or clogged gutters and downspouts.
- Inside, check for damp spots, mold growth, and any musty odors, especially in basements, bathrooms, and other areas prone to moisture. Ensure that all areas are accessible for inspection, removing any obstructions if necessary.
Tools and Equipment Needed for a DIY Inspection
- For a DIY waterproofing inspection, some basic tools and equipment can be helpful. These include a flashlight for inspecting dark or confined spaces, a moisture meter to detect dampness in walls and floors, and a notepad to record any findings.
- It's also useful to have a camera or smartphone to take pictures of any problem areas. This can be helpful for future reference or if you need to consult with a professional for repairs.
Exterior Waterproofing Inspection
A thorough exterior waterproofing inspection is key to ensuring the integrity and longevity of your home's structure. This section will guide you through inspecting critical areas such as the foundation, basement walls, windows, and doors to identify potential waterproofing issues.
Foundation and Basement Walls
Checking for Cracks, Seepage, and Signs of Moisture in Foundation Walls
- Begin by examining the foundation walls for any visible cracks or fissures. Even small cracks can be entry points for water and should be addressed promptly.
- Look for signs of seepage or moisture, such as damp spots, efflorescence (white powdery residue), or mold growth. These signs indicate that water is penetrating the foundation and may require further investigation and repair.
- Pay attention to areas where different materials meet, such as where the foundation meets wooden framing, as these can be vulnerable points for water entry.
Inspecting Exterior Drainage Systems Like Gutters and Downspouts
- Proper functioning of gutters and downspouts is crucial in directing water away from the foundation. Inspect them for blockages, leaks, or damage that could impede their effectiveness.
- Ensure that downspouts are directing water away from the foundation and that the ground around the foundation slopes away from the house to prevent water pooling.
Windows and Doors
Inspecting Seals Around Windows and Doors for Leaks or Damage
- Check the seals around windows and doors for any gaps, cracks, or signs of wear. Compromised seals can allow water to seep into the walls, leading to moisture problems.
- Look for signs of water damage around window and door frames, such as peeling paint, warping, or discoloration, which can indicate leaks.
Identifying Areas Needing Caulk or Weather stripping Replacement
- If gaps or cracks are found in the seals, they may need to be re-caulked or have weather stripping replaced. This is a relatively simple and cost-effective way to prevent water infiltration.
- Pay special attention to areas exposed to the elements or subject to heavy use, as these are more likely to experience wear and tear.
Interior Waterproofing Inspection
An interior waterproofing inspection is crucial in identifying potential issues that can compromise the health and safety of your home. This section will focus on inspecting key areas such as basements, crawlspaces, walls, and ceilings to detect signs of water damage and ensure the effectiveness of internal waterproofing measures.
Basement and Crawlspace
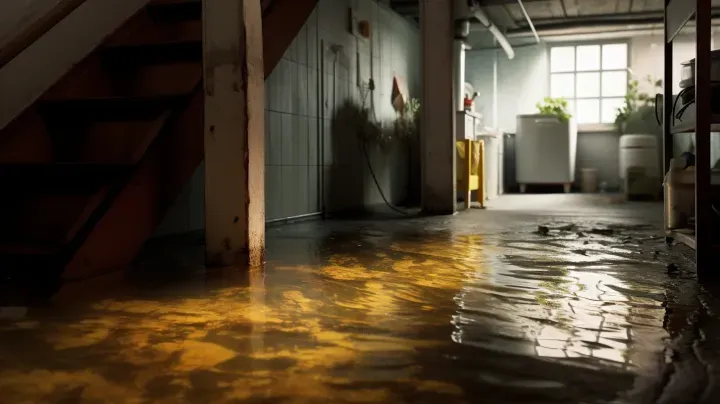
Signs of Dampness or Water Damage in Basements and Crawlspaces
- Begin your inspection by looking for any signs of dampness or water damage in the basement and crawlspace areas. This includes checking for wet spots, standing water, or a musty odor, which are clear indicators of moisture problems.
- Examine the walls and floors for any discoloration, efflorescence, or mold growth. These signs can indicate seepage or high humidity levels within these spaces.
Checking Sump Pumps and Internal Drainage Systems
- If your home is equipped with a sump pump, ensure that it is functioning correctly. Test the pump by pouring water into the sump pit and observing whether it activates and efficiently drains the water.
- Inspect any internal drainage systems, such as French drains or weeping tiles, for blockages or signs of malfunction. These systems are crucial in directing water away from the foundation and preventing basement flooding.
Walls and Ceilings
Identifying Water Stains, Mold, or Peeling Paint on Walls and Ceilings
- Carefully inspect walls and ceilings for any signs of water stains, mold growth, or peeling paint. These are often symptoms of an underlying moisture issue, such as leaks or condensation.
- Pay special attention to areas near plumbing fixtures, windows, and exterior walls, as these are common sites for moisture intrusion.
Inspecting for Condensation Issues or Plumbing Leaks
- Look for signs of condensation, such as water droplets or dampness on windows, walls, or pipes. Persistent condensation can lead to mold growth and should be addressed.
- Check around plumbing fixtures, pipes, and fittings for any signs of leaks. Even small leaks can lead to significant water damage over time and should be repaired promptly to prevent further issues.
Roof and Attic Inspection
A comprehensive roof and attic inspection is vital in maintaining the overall health of your home. It helps in identifying potential issues that can lead to water damage and compromises in insulation. This section will guide you through inspecting roofing materials and the attic space to ensure they are in optimal condition.
Roofing Materials
Examining Shingles, Tiles, or Other Roofing Materials for Damage or Wear
- Start your roof inspection by examining the condition of the shingles, tiles, or other roofing materials. Look for signs of wear such as cracking, curling, or missing pieces. These can indicate that the roof is nearing the end of its lifespan or has been compromised by weather conditions.
- Pay attention to areas where water runoff is heavy, as these are more prone to wear and damage. Also, look for any moss or algae growth, which can retain moisture and degrade roofing materials over time.
Checking Flashing, Vents, and Chimneys for Proper Sealing
- Inspect the flashing around chimneys, vents, and where the roof meets walls. These areas are common sites for leaks. Ensure that the flashing is intact, without rust or breaks, and that it is properly sealed.
- Check the seals around roof vents and chimneys. Cracked or deteriorating seals can allow water to seep into the attic, leading to moisture problems.
Attic Space
Inspecting Attic Insulation and Ventilation for Signs of Moisture
- In the attic, examine the insulation for any signs of dampness or mold. Wet insulation loses its effectiveness and can lead to higher energy costs and moisture-related issues in the home.
- Ensure that the attic has adequate ventilation. Poor ventilation can lead to moisture buildup, which not only damages the roof structure but can also create an environment conducive to mold growth.
Looking for Rust or Water Marks on Nails and Hardware
- Check for rust on nails and hardware in the attic. Rust can indicate that there has been water intrusion or excessive moisture in the attic.
- Look for water stains or marks on the attic's wooden components, as these are telltale signs of leaks. Pay special attention to areas directly under the roof's peak and around vents and chimneys.
Plumbing and Bathroom Inspection
Regular inspections of your home's plumbing system and bathroom areas are essential for maintaining a waterproof and functional living space. This section will guide you through the process of inspecting pipes, fittings, and key areas in bathrooms and kitchens to identify potential issues before they escalate.
Pipes and Fittings
Checking Pipes for Leaks, Corrosion, or Damage
- Begin your inspection by checking all accessible pipes for any signs of leaks, which might manifest as damp spots, drips, or puddles. Even small leaks can lead to significant water damage over time.
- Look for signs of corrosion or damage on pipes, especially in older homes. Corrosion can weaken pipes, making them more susceptible to leaks and bursts.
- Pay attention to areas with a history of freezing, as these are more likely to have suffered damage.
Inspecting Joints, Valves, and Connectors for Signs of Failure
- Examine all joints, valves, and connectors in the plumbing system. Look for any signs of wear, such as rust or mineral deposits, which can indicate a slow leak.
- Check that all fittings are tight and secure, but be careful not to overtighten, as this can cause damage. Any signs of moisture or drips around these areas warrant further investigation.
Bathroom and Kitchen Areas
Assessing Caulking and Grout in Showers, Bathtubs, and Sinks
- Inspect the caulking and grout around showers, bathtubs, and sinks. Over time, these can crack or deteriorate, allowing water to seep behind tiles and walls, leading to mold and structural damage.
- Look for any gaps or areas where the caulking has pulled away from the surface. In showers and bathtubs, pay special attention to corners and where the fixtures meet the walls.
Looking for Signs of Water Damage Under Sinks and Around Appliances
- Check under sinks and around appliances like dishwashers and refrigerators for any signs of water damage. This includes warped or discolored cabinetry, peeling materials, or a musty smell.
- Inspect the flooring around toilets, tubs, and showers for any soft spots or discoloration, as these can be indicators of a slow leak or past water damage.
FAQs
Recent Blog Posts
Crawl Space News


Schedule Your FREE Crawl Space Evaluation!
Did you know YOU DON'T HAVE TO BE HOME for us to provide you with your 100% FREE crawl space inspection and report?
Call Us Today at: 865-432-6743

Forever Guard Crawl Space Encapsulation and Repair of Knoxville is a specialty crawl space waterproofing company that services the greater Knoxville, TN and surrounding areas.
Business Hours
Sunday: 7:00 AM - 7:00 PM
Monday: 7:00 AM - 7:00 PM
Tuesday: 7:00 AM - 7:00 PM
Wednesday: 7:00 AM - 7:00 PM
Thursday: 7:00 AM - 7:00 PM
Friday: 7:00 AM - 7:00 PM
Saturday: 7:00 AM - 7:00 PM
legal info